NCA-4220A
Overview
Before flashing a new BIOS on an NCA-4220A, it is necessary to determine the currently installed version. You can see this in the BIOS setup overview.
If you encounter any questions or issues during the process, please contact us at support@landitec.de.
How to access the BIOS
The NCA-4220A is equipped with a console port that can be accessed using a console cable and appropriate software. This port allows the device’s screen signal to be output to a computer.
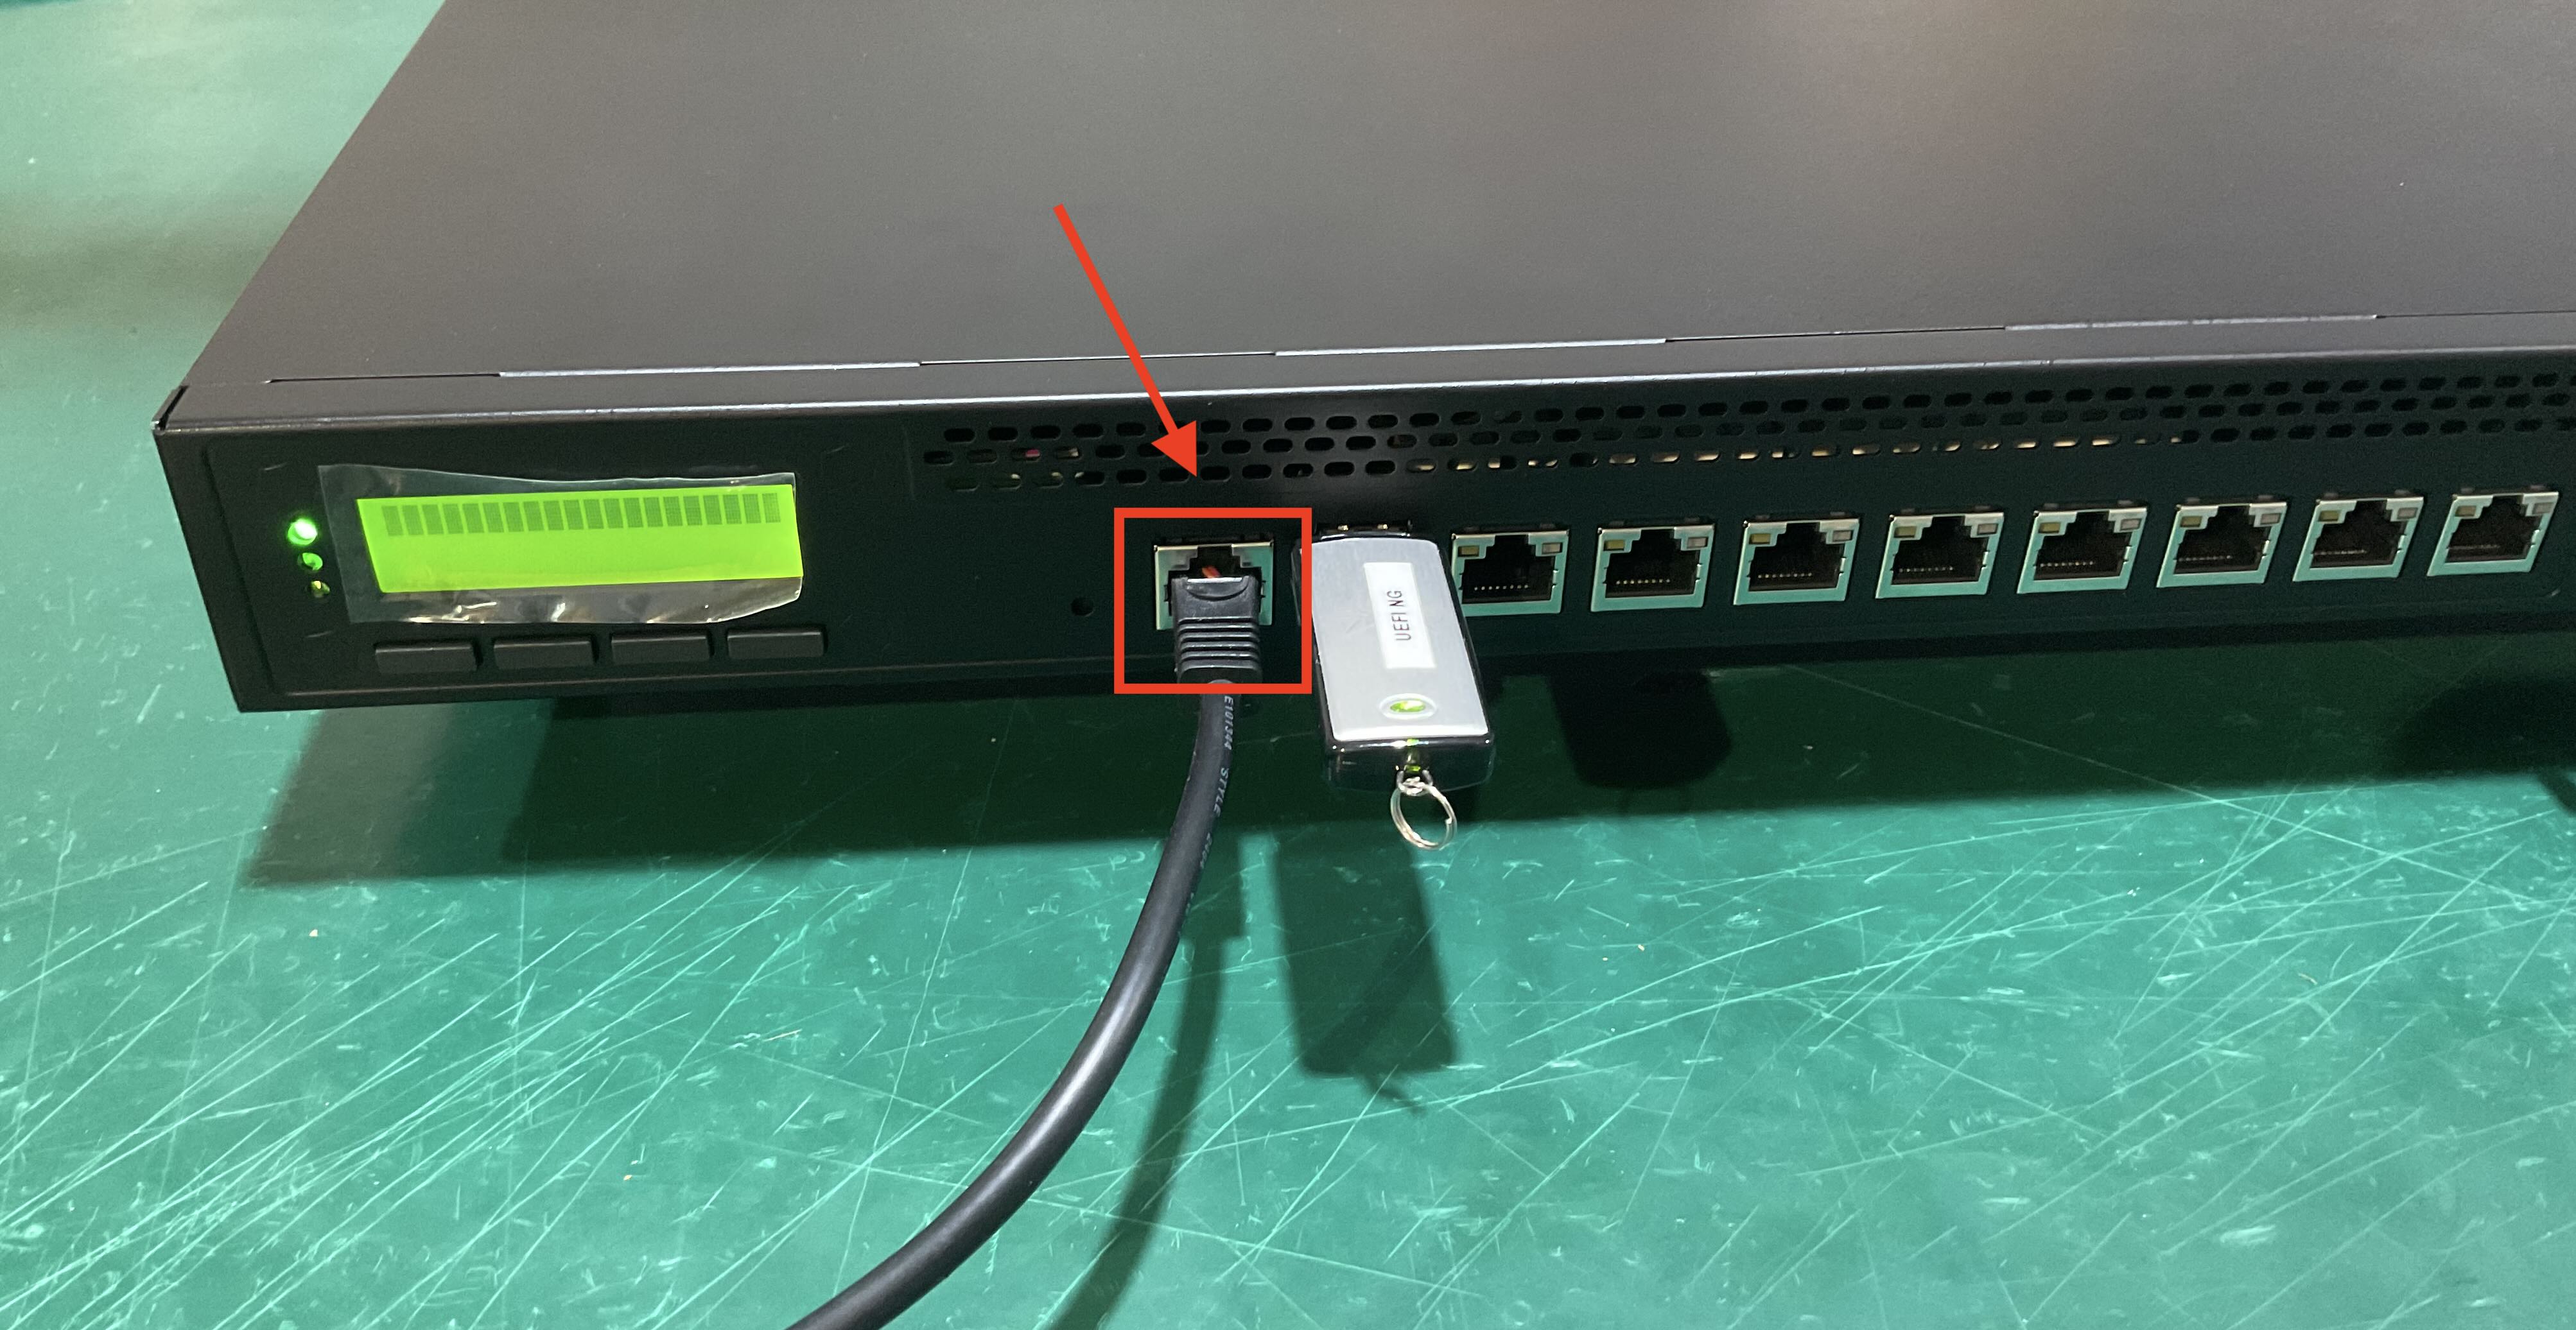
Use the console cable included in the package and connect it to the first port of the NCA-4220A. Connect the other end of the cable to a computer with a serial interface. This can be done using programs like Putty (Windows) or minicom (Linux).
Configure your terminal program to use the following settings:
| Speed | 115200bps |
|---|---|
| Parity | None |
| Data | 8 |
| Stopbits | 1 |
These settings are often predefined as 115200, 8N1.
Checking the BIOS Version
The BIOS can be opened by repeatedly pressing the DELETE or TAB key shortly after starting the device.
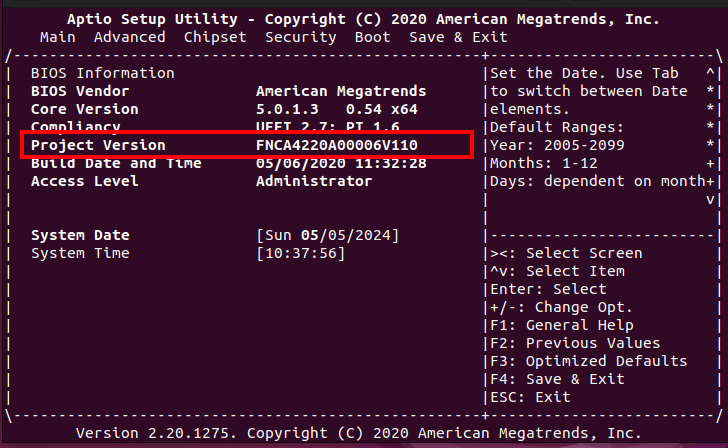
If the version FNCA4220A00006V110 (or FNCA4220A00006E110) is installed, the BIOS can only be updated in two steps. Start with Preparing for BIOS Flash. If the BIOS is newer, you can directly flash the new BIOS (see Flash Production BIOS).
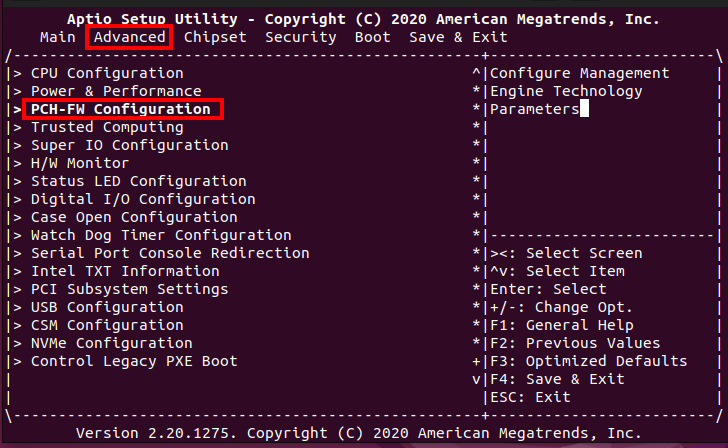
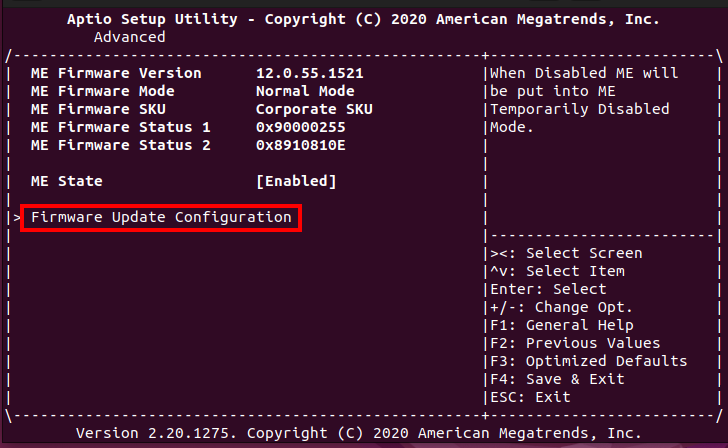
While in the BIOS setup, also check the ME version under Advanced/PCH-FW Configuration.
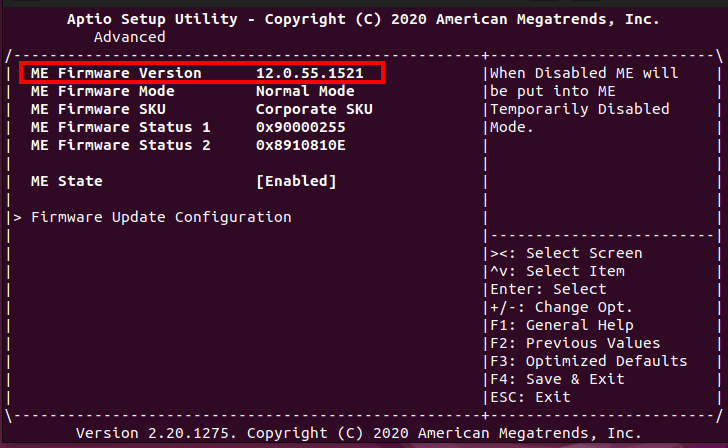
If the version 0.0.0.0 is displayed, the ME is not functional, and the device must be sent to us via RMA.
Please use the RMA form on our website at: https://www.landitec.com/rma/
Creating a USB Boot Stick
You will need a USB stick with a minimum size of 500 MB. This USB stick must be reformatted with FAT32. Then, extract the BIOS-4420.zip archive onto the USB stick. Afterward, there should be an EFI directory on the USB stick.
Preparation for BIOS Flash
To prepare for flashing the latest BIOS, the BIOS FNCA4220A00006V111 must first be installed without updating the ME. Attempting to update an NCA-4220A without this intermediate step will result in a boot loop, which can only be broken by removing the BIOS battery for about 5 minutes.
It is recommended to insert the prepared stick with the new BIOS image into a USB port at the beginning.
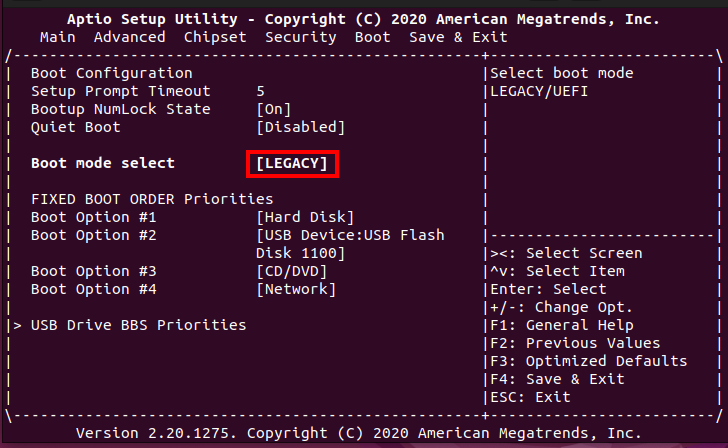
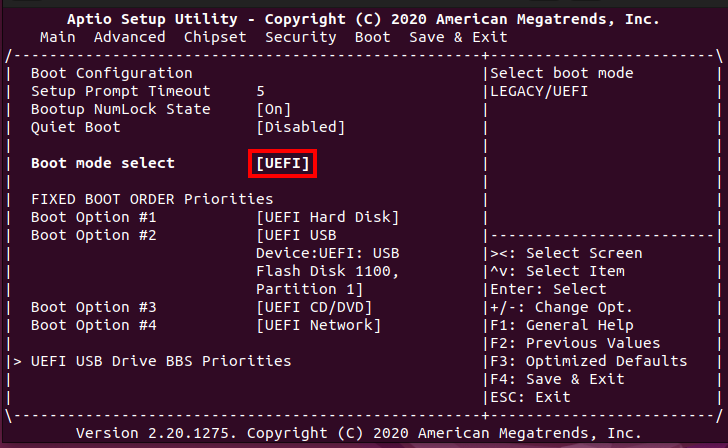
Step 1: Boot Order
In the BIOS setup, check under the Boot tab if the Boot mode select value is set to UEFI. If not, select it and save the new configuration in the Save & Exit tab.
Step 2: Boot from USB Stick
The USB stick with the new BIOS image must be connected to the appliance, then boot the appliance.
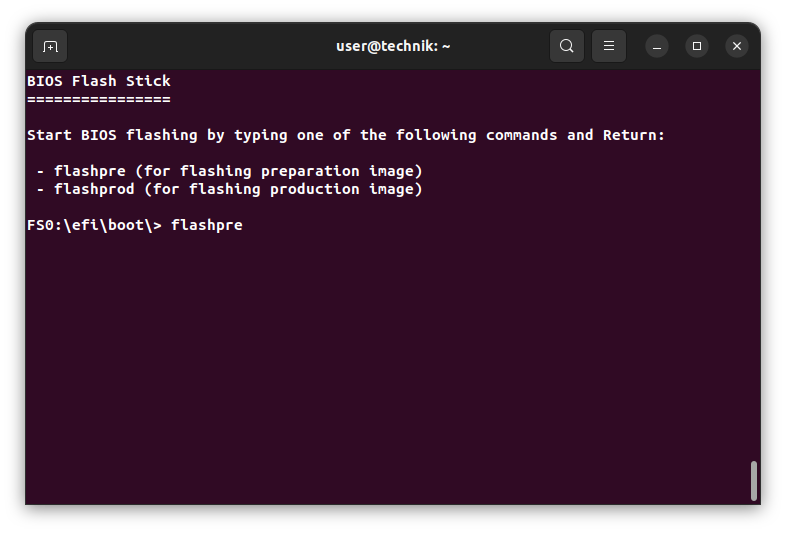
Wait until the boot process is complete, and then flash the BIOS with the flashpre command at the command line.
If the system does not boot from the USB stick, please re-enter the BIOS and select the USB stick as the boot medium under Boot Override in the last tab of the BIOS setup.
Error messages related to ME can be ignored here.
After the update is complete, turn off the appliance, remove the USB stick, and then restart the appliance to check if the BIOS has been updated (the BIOS version should be FNCA4220A00006V111).
Flash Production BIOS
The update is performed in several steps. It is recommended to insert the prepared stick with the new BIOS image into a USB port at the beginning.
Step 1: Boot Order
In the BIOS setup, check under the Boot tab if the Boot mode select value is set to UEFI. If not, select it and save the new configuration in the Save & Exit tab.
Step 2: Allow ME Update
After restarting, open the BIOS setup again. This time, select PCH-FW Configuration under the Advanced tab.
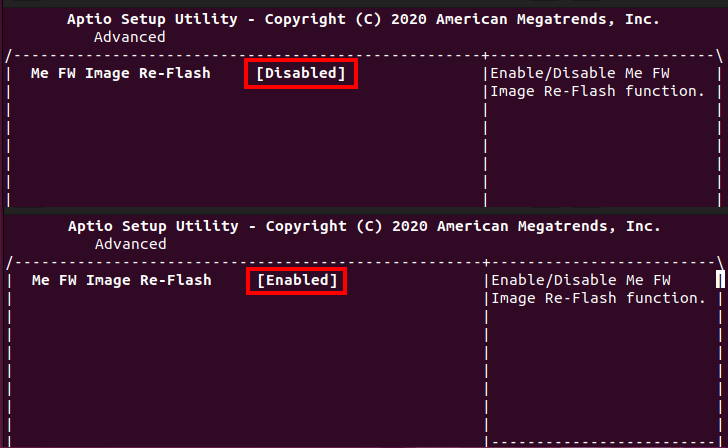
Under Firmware Update Configuration, change the ME FW Image Re-Flash setting from Disabled to Enabled. This setting only applies for the next system boot and will automatically reset to Disabled.
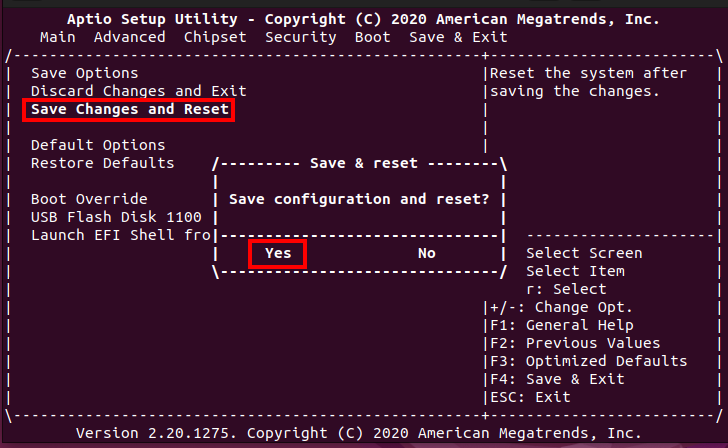
Save the setting via Save Changes and Reset in the Save & Exit tab. Confirm this with Yes.
Step 3: Flash BIOS
The device will now restart twice and then boot directly from the USB stick again.
If the boot is successful, an instruction to start the flash process will appear after a short time.
If the device restarts more than twice, repeat the process from Step 2 (Allow ME Update). Otherwise, the BIOS flash attempt will fail.
Now, start the BIOS update by entering flashprod.
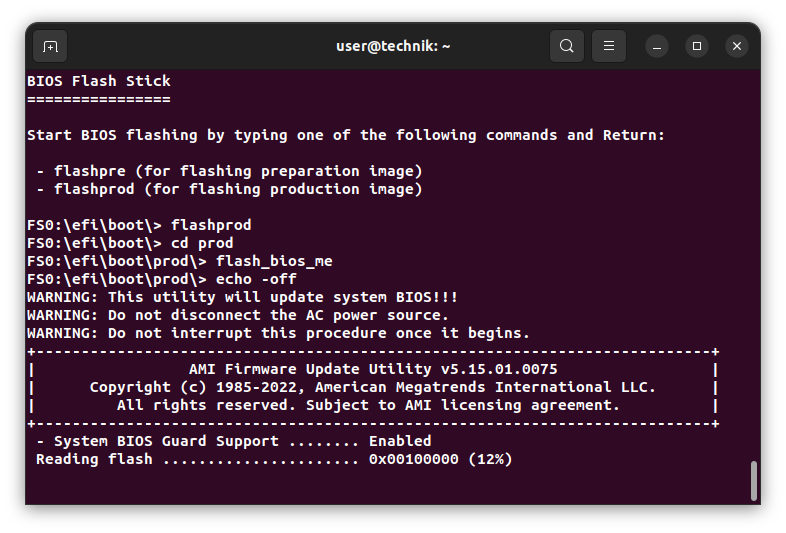
During the update, ensure that the ME messages are error-free. If not, repeat the flashing process starting from Step 2.
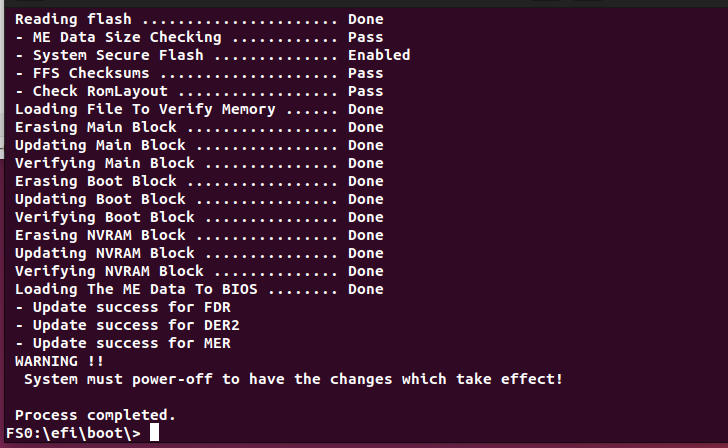
If everything runs smoothly, restart the appliance and check the BIOS version in the BIOS setup.