Introduction
Proxmox supports different types of storage for VM images and container. After an SDR installation you will find a disk prepared with LVM for it. If you need storage for a HA scenario, then you should use Ceph (on multi node clusters) or ZFS (especially on 2 node clusters).
But before you can create such storages on the unused disks all data have to be wiped.
Preparations
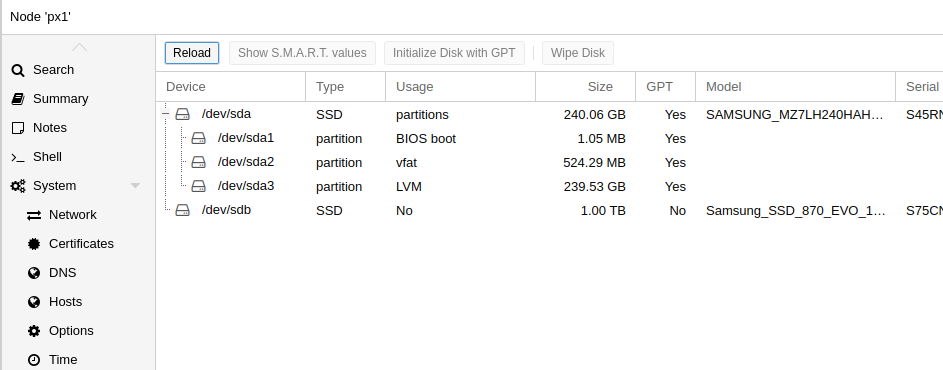
To check for unused disks login into the Proxmox WebUI and select a node. Then click on the menupoint Disks in the node menu. At least the table of node disks must show one disk with status No in the column Usage. If not, then it is possible to free used disks.
Unused disks have to be initialized with GPT1. For this select the row of the disk and click on the button Initialize Disk with GPT above the table. A few seconds later the disk is initialized.
If initialization fails, then the command /sbin/sgdisk /dev/sdX -Z on commandline may help.
Remove disks from LVM
When using Ceph or ZFS then often LVM storages on a node are not longer needed. For this the disks must be removed from LVM. Currently this can be done on commandline only.
First identify the disks which should be removed. In the Proxmox WebUI you can see the storages of the nodes.

Then in the node menu open Disks/LVM. There all VGs (Volume Groups) with their PVs (Physical Volumes) are listed. Existing LVM-Thin LVs (Logical Volumes) are displayed under Disks/LVM-Thin. Normally on a fresh installed system are three LVs: data (Thin), root and swap. The LVs root and swap are not displayed in the WebUI, but necessary for the system.
There are two possible situations:
- the LV data is on an own PV (e.g. pvevm) and disk. Then read Remove Volume Group from disk
- the LV data is part of another PV (e.g. pve). Then read Remove Disk from Volume Group
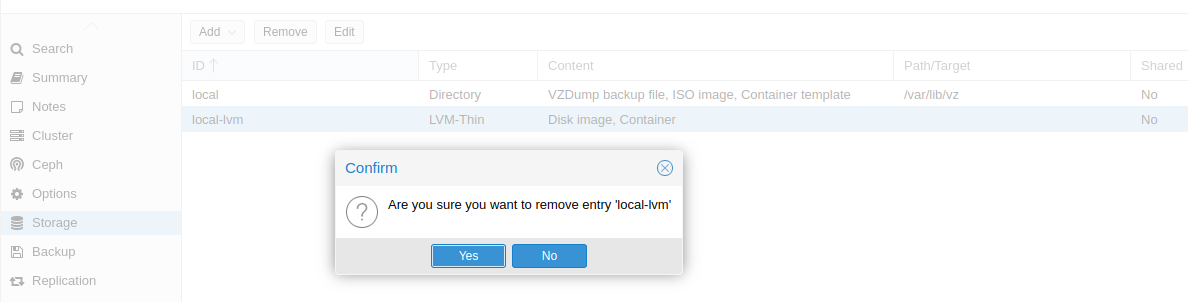
If data should be removed completely from all nodes, then delete the storage local-lvm in the Datacenter first.
For this open the storage menu in the Datacenter, select the storage and remove it using the Remove button.

Now switch to commandline. Here all LVM commands can be used to administrate LVM. The changes will be detected by the WebUI without any further action.
Remove Volume Group from disk
Now switch to commandline. Here all LVM commands can be used to administrate LVM. The changes will be detected by the WebUI without any further action.
This example will show you howto remove a Volume group and all included Logical groups from a disk, if the VG occupies the complete disk.
Check PVs:
root@tc3:~# pvs
  PV         VG    Fmt  Attr PSize     PFree
  /dev/sda3  pve   lvm2 a--  <223.08g  <165.08g
  /dev/sdb1  pvevm lvm2 a--  <930.54gg       0
Here the VG pvevm uses the complete disk /dev/sdb. To remove it the VG has to be deactivated. For this use the command vgchange:
root@tc3:~# vgchange -a n pvevm
  0 logical volume(s) in volume group "pvevm" now active
Now the VG and all included LVs can be removed:
root@tc3:~# vgremove -f pvevm
  Logical volume "data" successfully removed.
  Volume group "pvevm" successfully removed
Remove LVM labels from disk:
root@tc3:~# pvremove /dev/sdb1
  Labels on physical volume "/dev/sdb1" successfully wiped.
Clean disk:
root@tc3:~# wipefs -a -f /dev/sdb
/dev/sdb: 8 bytes were erased at offset 0x00000200 (gpt): 45 46 49 20 50 41 52 54
/dev/sdb: 8 bytes were erased at offset 0xe8e0db5e00 (gpt): 45 46 49 20 50 41 52 54
/dev/sdb: 2 bytes were erased at offset 0x000001fe (PMBR): 55 aa
Remove Disk from Volume Group
Now switch to commandline. Here all LVM commands can be used to administrate LVM. The changes will be detected by the WebUI without any further action.
The next example will show you how to shrinken the LV data and remove a PV from a VG with two PVs. Normally the situation on Landitec GmbH appliances is more simple.
Check LVs and PVs:
root@tc3:~# lvs
  LV   VG  Attr       LSize   Pool Origin Data%  Meta%  Move Log Cpy%Sync Convert
  data pve twi-aotz-- 186.57g             0.00   10.42
  root pve -wi-ao----  27.00g
  swap pve -wi-ao----   8.00g
root@tc3:~# pvs
  PV         VG  Fmt  Attr PSize   PFree
  /dev/sda3  pve lvm2 a--  109.97g    0
  /dev/sdb1  pve lvm2 a--  111.79g    0
Here the LV data has to resize to 70GB, so that all LVs can be stored on /dev/sda3. After that the PV /dev/sdb1 can be removed from VG *pve and the PV /dev/sdb1 can be removed from LVM. Since a Thin-LVM cannot be resized currently, it must be removed and recreated with the right size.
Attention: all data on this Thin-LVM will be lost!
root@tc3:~# lvremove pve/data
Do you really want to remove and DISCARD active logical volume pve/data? [y/n]: y
  Logical volume "data" successfully removed
root@tc3:~# lvcreate -T -L 70G pve/data
  Using default stripesize 64.00 KiB.
  Logical volume "data" created.
root@tc3:~# lvs
  LV   VG  Attr       LSize  Pool Origin Data%  Meta%  Move Log Cpy%Sync Convert
  data pve twi-a-tz-- 70.00g             0.00   10.43
  root pve -wi-ao---- 27.00g
  swap pve -wi-ao----  8.00g
Now all stored data on /dev/sdb1 must be moved to */dev/sda3 to avoid lost of data. Then the PV /dev/sdb1 can be removed from VG pve and /dev/sdb1 can be cleaned from LVM signatures:
root@tc3:~# pvmove /dev/sdb1
  /dev/sdb1: Moved: 5.56%
  /dev/sdb1: Moved: 100.00%
root@tc3:~# pvs
  PV         VG  Fmt  Attr PSize   PFree
  /dev/sda3  pve lvm2 a--  109.97g   4.83g
  /dev/sdb1  pve lvm2 a--  111.79g 111.79g
root@tc3:~# vgreduce pve /dev/sdb1
  Removed "/dev/sdb1" from volume group "pve"
root@tc3:~# pvremove /dev/sdb1
  Labels on physical volume "/dev/sdb1" successfully wiped.
root@tc3:~# pvs
  PV         VG  Fmt  Attr PSize   PFree
  /dev/sda3  pve lvm2 a--  109.97g 4.83g
Wipe disk
As last step before the disk can be used for Ceph or ZFS the disk should be wiped. For this open in the WebUI the Disks menu of the node. Then select the disk and click on the Wipe Disk button above the table.
Now the disk is ready to use it for Ceph, ZFS or LVM.